01 / Enter
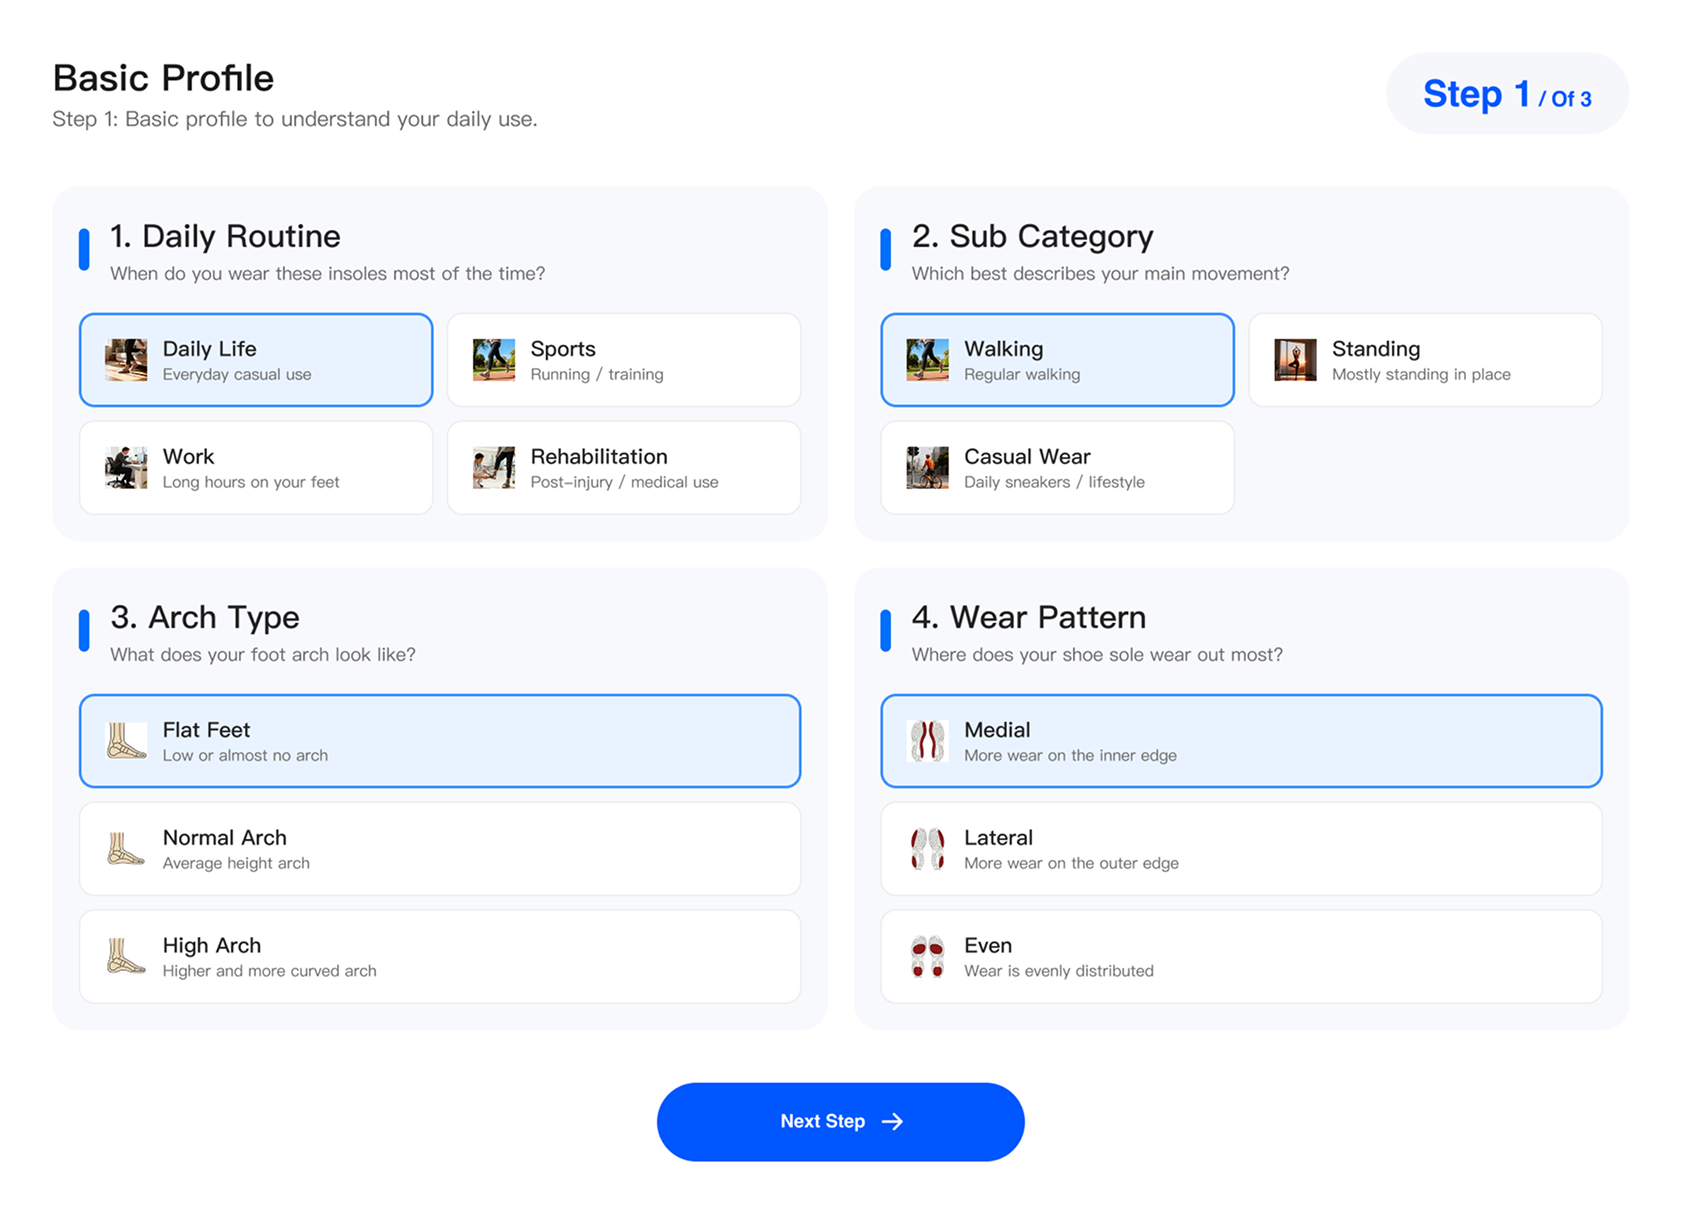
Enter your profile
Guided inputs — foot dimensions, activity, and support preferences. No modeling, no scan.
Ergono3D is a browser-based custom insole STL generator. Enter a foot profile, dial in the fit, preview the insole in 3D, and export a print-ready STL for TPU. No CAD modeling, no scanner, no lab. Design it, print it, wear-test it, and adjust in minutes.
No CAD training and no scanner purchase. The generator turns a guided foot profile into an adjustable 3D insole you can preview and export, start to finish in your browser. Each step takes minutes, and nothing you enter is locked in: change an answer and the insole updates on screen.
Guided inputs — foot dimensions, activity, and support preferences. No modeling, no scan.
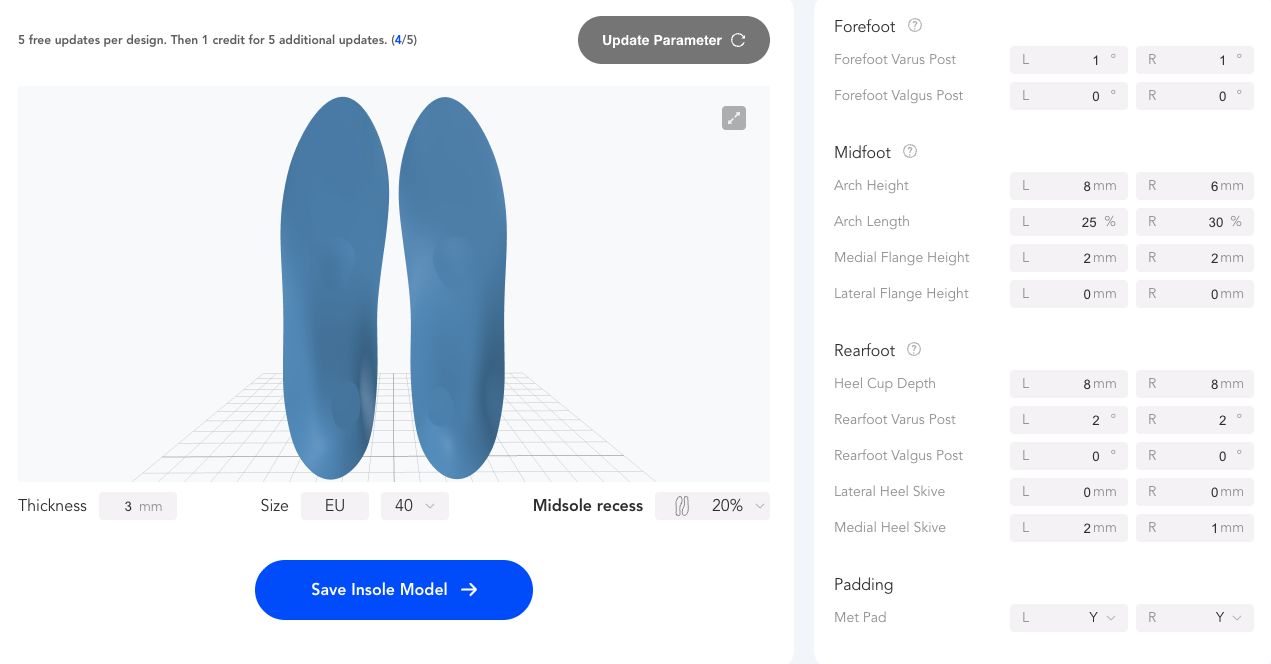
Arch height, heel cup, forefoot posting, skives, flange, and per-zone stiffness — all adjustable. See the parameters guide →
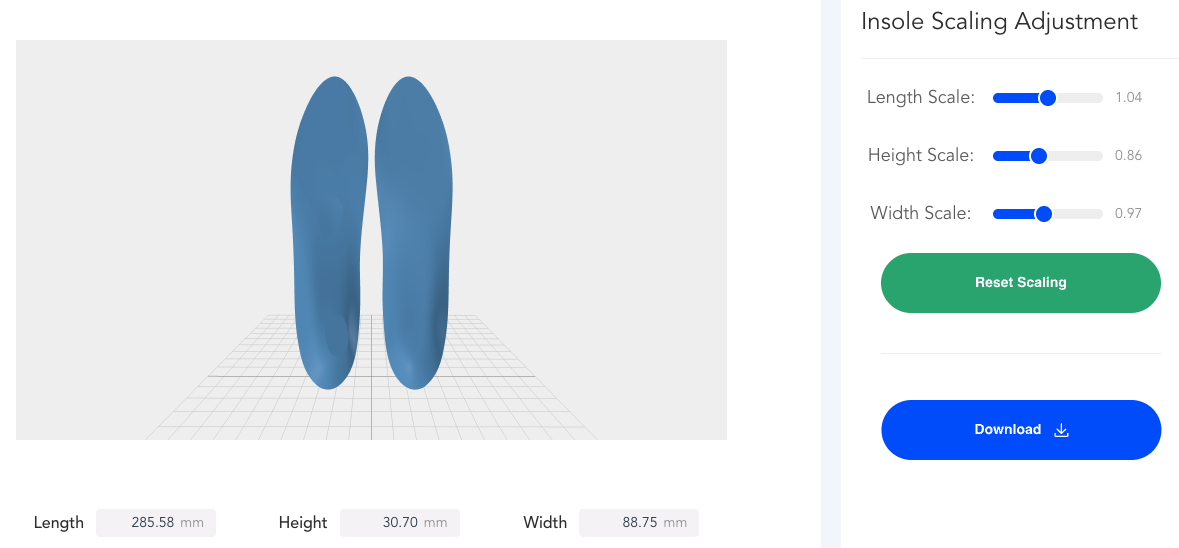
See the insole update live as you tune it — no round-trip to a modeler or a lab.
Download a print-ready STL, packaged with a starting TPU slicer profile.
The generator's output is a plain STL, not locked to any printer or slicer. Take it to Bambu Studio, PrusaSlicer, Cura, or OrcaSlicer and print in flexible TPU.
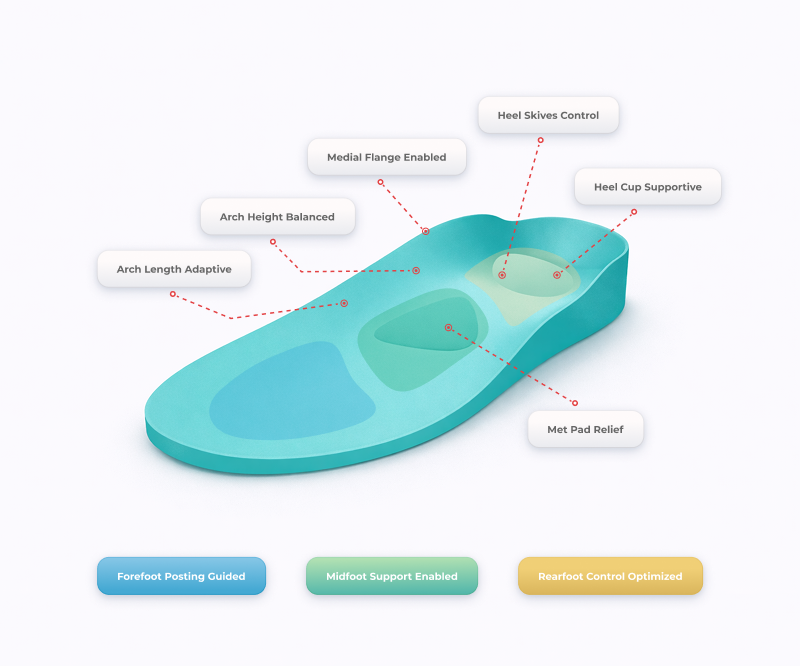
Every generated insole is a full-contact shell shaped to the foot profile you entered. It carries arch support at the height you set, a heel cup for stability, a forefoot zone, and per-zone stiffness, so the heel, midfoot, and forefoot can each feel different underfoot. The top surface comes finished and ready for a cover if you want to add one. Paid exports include a starting TPU slicer profile, so the file is ready to slice the moment it lands on your machine. Left and right are generated as a matched pair, and feet that differ can be set up separately.
The generator fits anyone who wants a custom insole without a CAD seat, a scanner, or a lab invoice. Three groups get the most out of it.
You already own a printer and a spool of TPU. Generate a fitted insole STL, print a pair for a few dollars of filament, and re-run the design whenever it needs a tweak, without touching CAD.
Set a firmer pair for running and a cushioned pair for long days on your feet. Because each design is saved, a new activity is a quick edit and a re-export, not a fresh order and another wait.
Trial parametric insole design and in-house printing before committing to lab hardware. Start from your assessment notes, adjust the fit, and iterate in the same session instead of shipping cases out.
Every other path to a custom insole design makes you buy software, buy hardware, or wait on someone else. A parametric generator collapses that into a browser session. You keep the design, the fit, and the turnaround in one place, and every export is a file you can print again tomorrow or hand to a print service.
| Other paths | What you still have to do | Ergono3D generator |
|---|---|---|
| Manual CAD / 3D modeling | Learn CAD, model each insole by hand, pay per-seat licenses | Guided parameters — no manual modeling step |
| 3D scanner workflow | Buy and run a scanner, clean up scan data before you can design | Measurement- and questionnaire-based — no scanner to start |
| External orthotic lab | Wait days per pair, accept what the lab makes, pay per pair | Adjust and re-export in-session — you keep control |
| Static STL from a marketplace | One fixed file, no fit control, no personalization | A custom STL per foot, adjustable and re-editable |
Preview the full workflow for free, with no card required. When you're ready to print, unlock STL downloads with credits: one credit exports an STL and covers several design updates, and credits stay valid for the plan window rather than expiring the day you buy. Prices shown in AUD.
Running a lab or studio with high volume? Studio Pack is credits valid 6+ months with full parameter control — get in touch. See the full pricing & credits breakdown →
A standard STL file, ready to open in any slicer — Bambu Studio, PrusaSlicer, Cura, or OrcaSlicer. Paid plans package the STL with a starting TPU slicer profile so it lands on your printer ready to slice.
No. Ergono3D turns guided inputs — foot profile, activity, and support preferences — into an adjustable 3D insole. There's no CAD modeling, and no scanner is required to start; a measurement- and questionnaire-based setup is enough.
Any printer that handles flexible filament — Bambu Lab, Prusa, and most modern FDM machines. Insoles are printed in flexible TPU (around 95A shore hardness); the output is a plain STL, so it isn't tied to one printer. New to it? See the TPU insole printing guide.
Yes. On paid plans your designs are saved in a history dashboard, so you can reopen a design, adjust the parameters, and re-export an updated STL any time — for a different activity or after a fit test.
Yes. The Free Preview plan runs the full workflow and previews your insole in 3D at no cost and with no card. STL downloads are unlocked on a paid plan, or with a one-time A$9.90 download add-on on the free plan.
The core fit parameters are adjustable, including arch height, heel cup, forefoot posting, skives, flange, and per-zone stiffness, all with a live 3D preview. For a full walkthrough of what each one does, see the insole design parameters guide.
Yes. Enter each foot's profile and the generator produces a matched left and right insole STL. Feet often differ slightly, so the two don't have to be identical.
The guided setup walks you through what to measure, and also accepts activity- and questionnaire-based answers, so you can start without precise numbers and refine the fit later once you've worn a test print.
A scanner captures the shape of your foot; the generator builds an adjustable insole from a foot profile. You tune arch, heel, and stiffness directly and re-export in seconds, with no scanner to buy and no scan data to clean up first.
Run the full workflow and preview your custom insole in 3D, with no card, no CAD, and no scanner. Unlock the STL when you're ready to print, then run it with the settings on the TPU printing guide.