01 / Enter
Enter your findings
Translate podoscopy results — arch, alignment, pressure zones, size — into guided design inputs.
A podoscopy assessment shows you the footprint, arch, alignment, and pressure pattern — but it stops at diagnosis. Ergono3D is the next step: turn those findings into an adjustable, 3D-printable insole, preview the geometry online, and export a print-ready STL for in-house printing or a local production partner.
Podoscopes and diagnostic software are built to measure and document the foot — arch contact, angles, valgus or varus, loading. That's the assessment half. Turning the assessment into a physical, custom insole is a separate step that usually means an external lab, generic CAD, or a fixed off-the-shelf file. Ergono3D closes that gap.
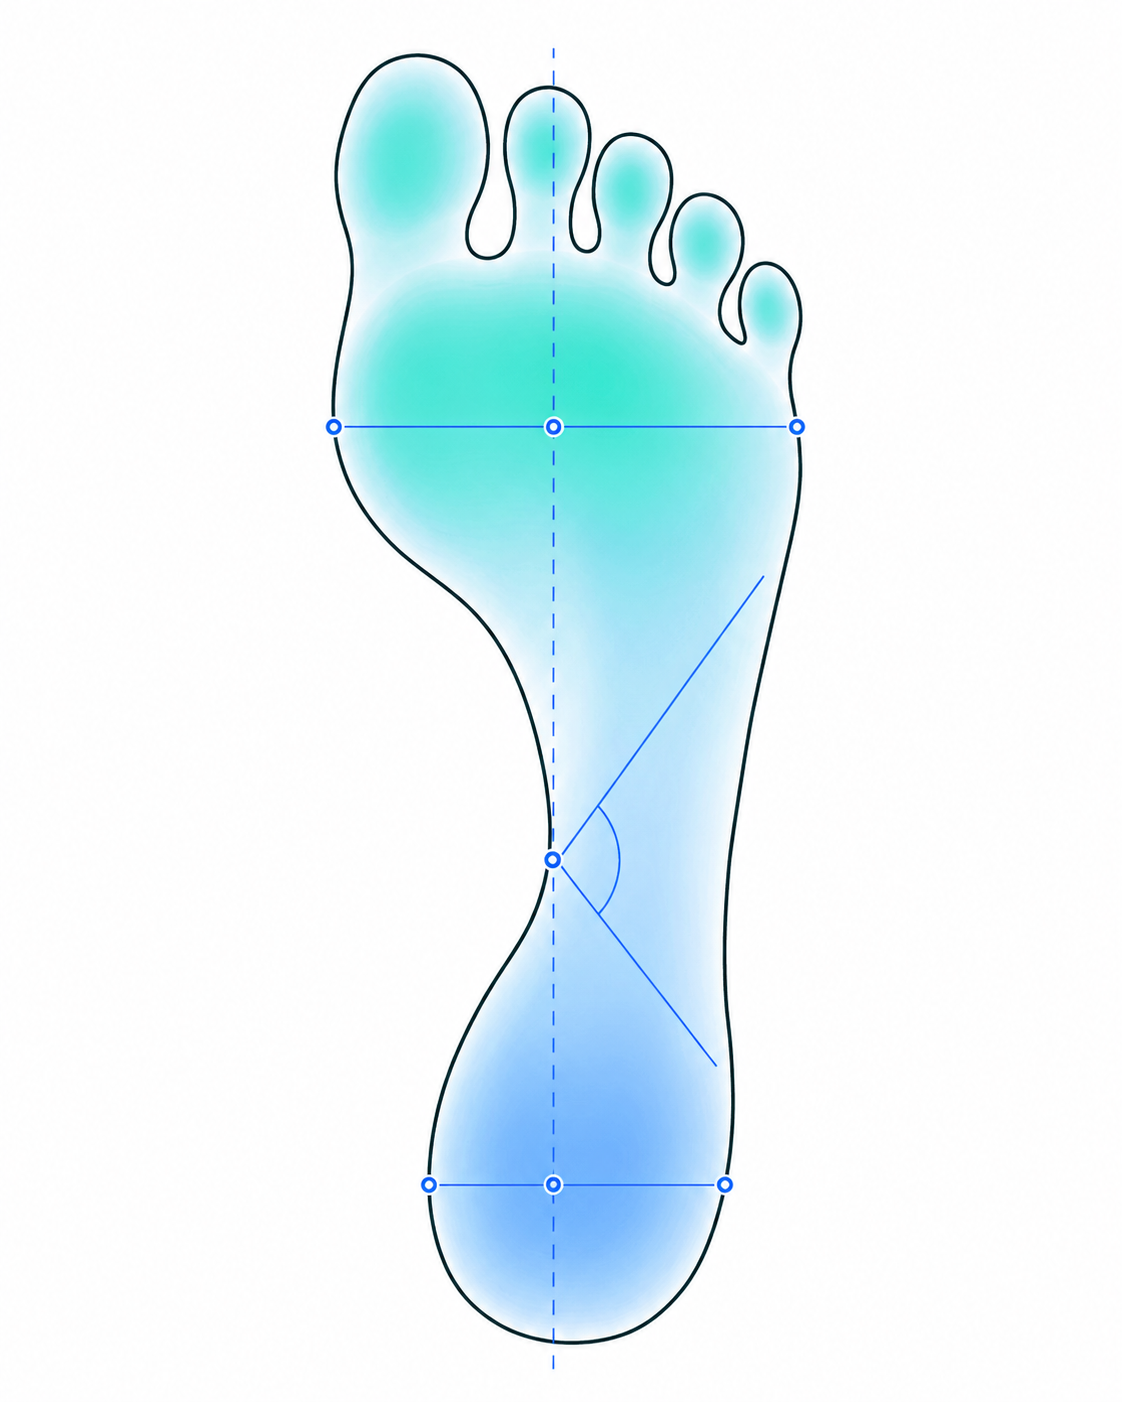
A podoscopy exam: plantar footprint, arch profile, rearfoot alignment, pressure pattern, foot dimensions — recorded in your clinic.
Those findings become an adjustable insole design and a print-ready STL — without CAD modeling, a scanner purchase, or a lab round-trip.
A podoscopy workup already gives you a measurements list — arch and angle indices, foot dimensions, alignment. Each one maps onto a named, adjustable design parameter, so the readout drives the insole instead of a manual modeling guess.
| Podoscopy index | Typical reading | Ergono3D design response |
|---|---|---|
| Clark angle | 37.1° | Arch profile & medial support |
| KY ratio | 0.63 | Arch height parameter |
| Wejsflog ratio | 0.67 | Arch-flattening index → midfoot support |
| Alpha / Beta / Gamma | 104.8° / 17.5° / 17.7° | Hallux & forefoot alignment → forefoot posting |
| Foot length / width | 259 / 173 mm | Shell size & width scaling |
| Rearfoot valgus / varus | heel view | Heel cup depth & rearfoot posting |
These are the readings a podoscopy assessment already produces — for example the Clark, KY, alpha/beta/gamma and Wejsflog indices output by podoscope software such as MultiReha. Ergono3D is device-agnostic: it works from measurement- and questionnaire-based inputs, so no specific podoscope, brand, or scanner is required to start a design.
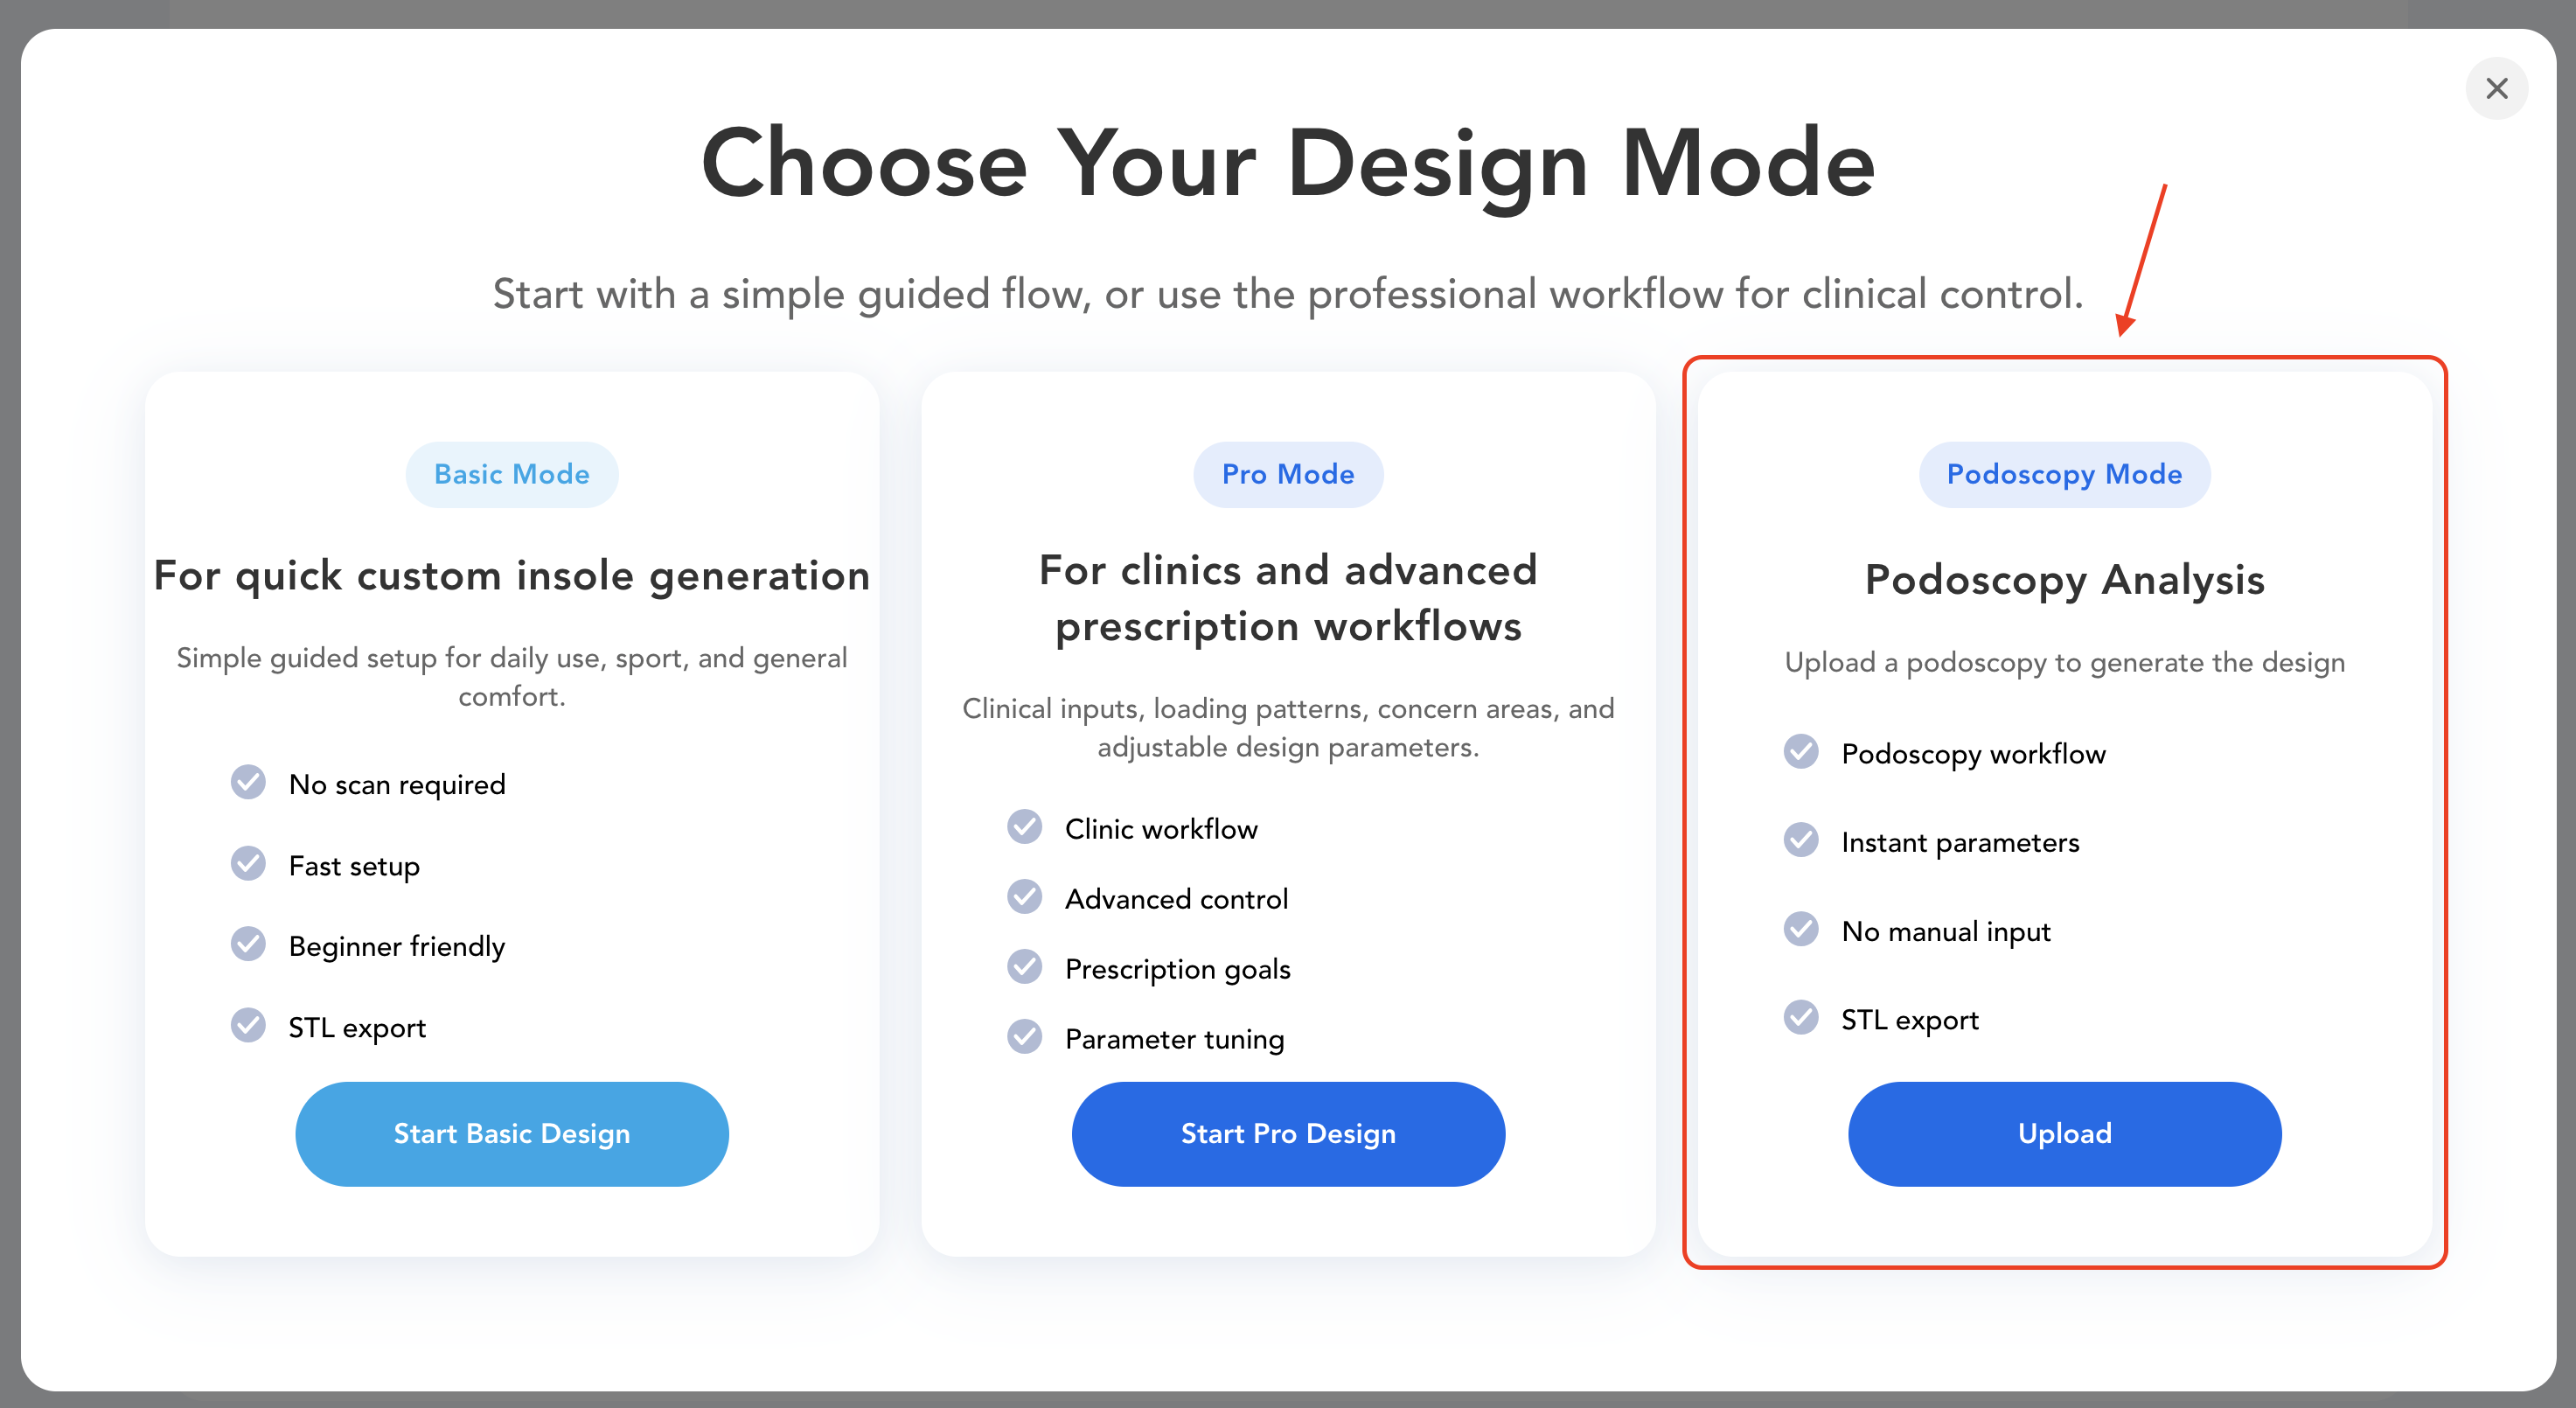
Your podoscopy assessment is the starting point. From there, Ergono3D adds four guided, repeatable steps — no scanner, no CAD training, and no upfront software cost.
Translate podoscopy results — arch, alignment, pressure zones, size — into guided design inputs.

Named clinical parameters become an adjustable 3D insole mesh — no manual CAD modeling.

Review the geometry, fine-tune, and export a production-ready STL with TPU slicer profiles.

Print in-house on Bambu, Prusa, or Ultimaker, or send the STL to a production partner.
Diagnostic software, external labs, and static STL files each cover part of the path from assessment to product. Ergono3D was built for the design-to-print step a clinic controls in-house.
| Path after the exam | What the clinic still has to do | Ergono3D |
|---|---|---|
| Diagnostic / podoscope software only | Measure and document, then go elsewhere to actually make the insole | Picks up the findings and produces a print-ready design file |
| External orthotic lab | Wait days per revision; accept what the lab produces; pay per pair | Adjust parameters in-session and re-export — no lab back-and-forth |
| Generic CAD / 3D modeling | Train a CAD operator; model each case by hand; pay per-seat licenses | Parameters named in clinical vocabulary — no manual modeling step |
| Static STL marketplace file | One fixed file, no patient context, no parameter control | A custom file per case, adjustable, packaged with TPU slicer profiles |
Average turnaround per case
No. Ergono3D is device-agnostic. It works from the findings of any podoscopy or foot assessment — the footprint, arch profile, alignment notes, and pressure observations you already record — regardless of which podoscope or platform you use.
No. Diagnostic and podoscope software measures and documents the foot. Ergono3D picks up where that stops: it turns those findings into an adjustable, print-ready insole design file. The two are complementary — assessment on one side, a manufacturable design on the other.
Yes. Findings such as arch profile, Clark angle, rearfoot valgus or varus, forefoot loading, and foot length and width map onto named design parameters — arch height, heel cup depth, posting, regional stiffness, and shell sizing — so the clinical picture drives the design directly.
No scanner is required to start. Ergono3D works from measurement-based and questionnaire-based inputs, so a podoscopy assessment is enough to begin a design. You can still incorporate scanner data later if your workflow uses it.
Ergono3D outputs a custom insole or orthotic STL file that can be prepared for 3D printing, packaged with TPU slicer profiles.
Yes. Clinics can print in-house on printers such as Bambu, Prusa, or Ultimaker with suitable TPU material and printing experience, or send the STL to a print service or local manufacturing partner.
With an external lab you wait days for each revision and accept whatever the lab produces. With Ergono3D you adjust parameters in the same session and re-export an updated STL in minutes — keeping design control and turnaround inside the clinic.
No. Ergono3D does not replace clinical judgment. It is a design-file workflow tool that helps clinics turn assessment findings into adjustable STL files. Clinical assessment and patient decisions remain with the clinic.
Pilot the path from podoscopy findings to a print-ready insole STL — no CAD, no scanner purchase, no lab round-trip — before changing your wider clinic process.
Running a podiatry, orthotic, or sports-rehab clinic? See the full clinic insole design workflow.
Footprint, arch, alignment, and pressure observations become guided design inputs — no new hardware required.
Move from assessment notes to adjustable insole geometry, and re-export after fitting feedback.
Check fit, TPU behavior, and revision speed before scaling the workflow.